These Acoustic Treatment Hacks will help you get a Reliable, Repeatable Reference Sound from your room EVERY TIME…
So you can crank out professional sounding mixes faster than you ever thought possible…
Even if you’re in a small, difficult, hard-to-treat space.
00
DAYS
00
HOURS
00
MINS
00
SECS
Featured on...
Dear Friend,
If you want to stop spending all your time researching when, where, and how to add acoustic treatment to your mixing room…
so you can focus on producing mind-blowing mixes for your clients…
then this is going to be the most important message you read all day.
Here’s why…
After starting my adult life as an aerospace engineer (no seriously!) by training, I developed a love for mixing music.
To make a long story short, I took my education and training and started to apply it to the acoustic challenges in my own studio space. Once I had that down, I started a side business treating other people’s studios.
It quickly turned into my main business, and that is where I learned the ins and outs of acoustic treatment and how to turn just about ANY room into a great sounding space.
Here’s the thing.
You already know that you need acoustic treatment to get the best results from your studio.
Here’s an experiment you can try. Go on any audio forum (the more “pros” there are there, the better…) and tell them you have some money to spend on your studio.
Ask what gear you should buy next…
I guarantee that someone will tell you that if you haven’t properly treated your studio then you’re just wasting your money buying better equipment.
So off you go, searching that same forum for information on acoustic treatment, only to find that it’s just a jumbled mess of questionable information mixed with diagrams that you need to be an architect or engineer to read.
Reverb times? Waveforms? Bass response? Reflection points? How do you even measure all of those things properly?
So you price out acoustic treatment with one of the forum advertisers and find out that it’s going to cost you THOUSANDS of dollars, and that’s not even going to get you everything that you need (at least according to that company).
That’s when you start thinking about going the DIY route again.
But even that’s another deep rabbit hole. How many panels do you need? What size? Who has the best plans? What about the giant window in your room?
Do you have the tools you need? Are you confident enough in your placement to start drilling holes in your walls?
And the big question…
What if you invest all this time, money, and labor into your DIY treatment… and it makes things worse? How will you know if it will give you the results you’re after?
Before you know it, you’ve spent hours and hours researching… And you still don’t have any more acoustic treatment than when you started… AND you haven’t mixed any music!
Thankfully, I have the solution for you.
I’d Like To Introduce You To...
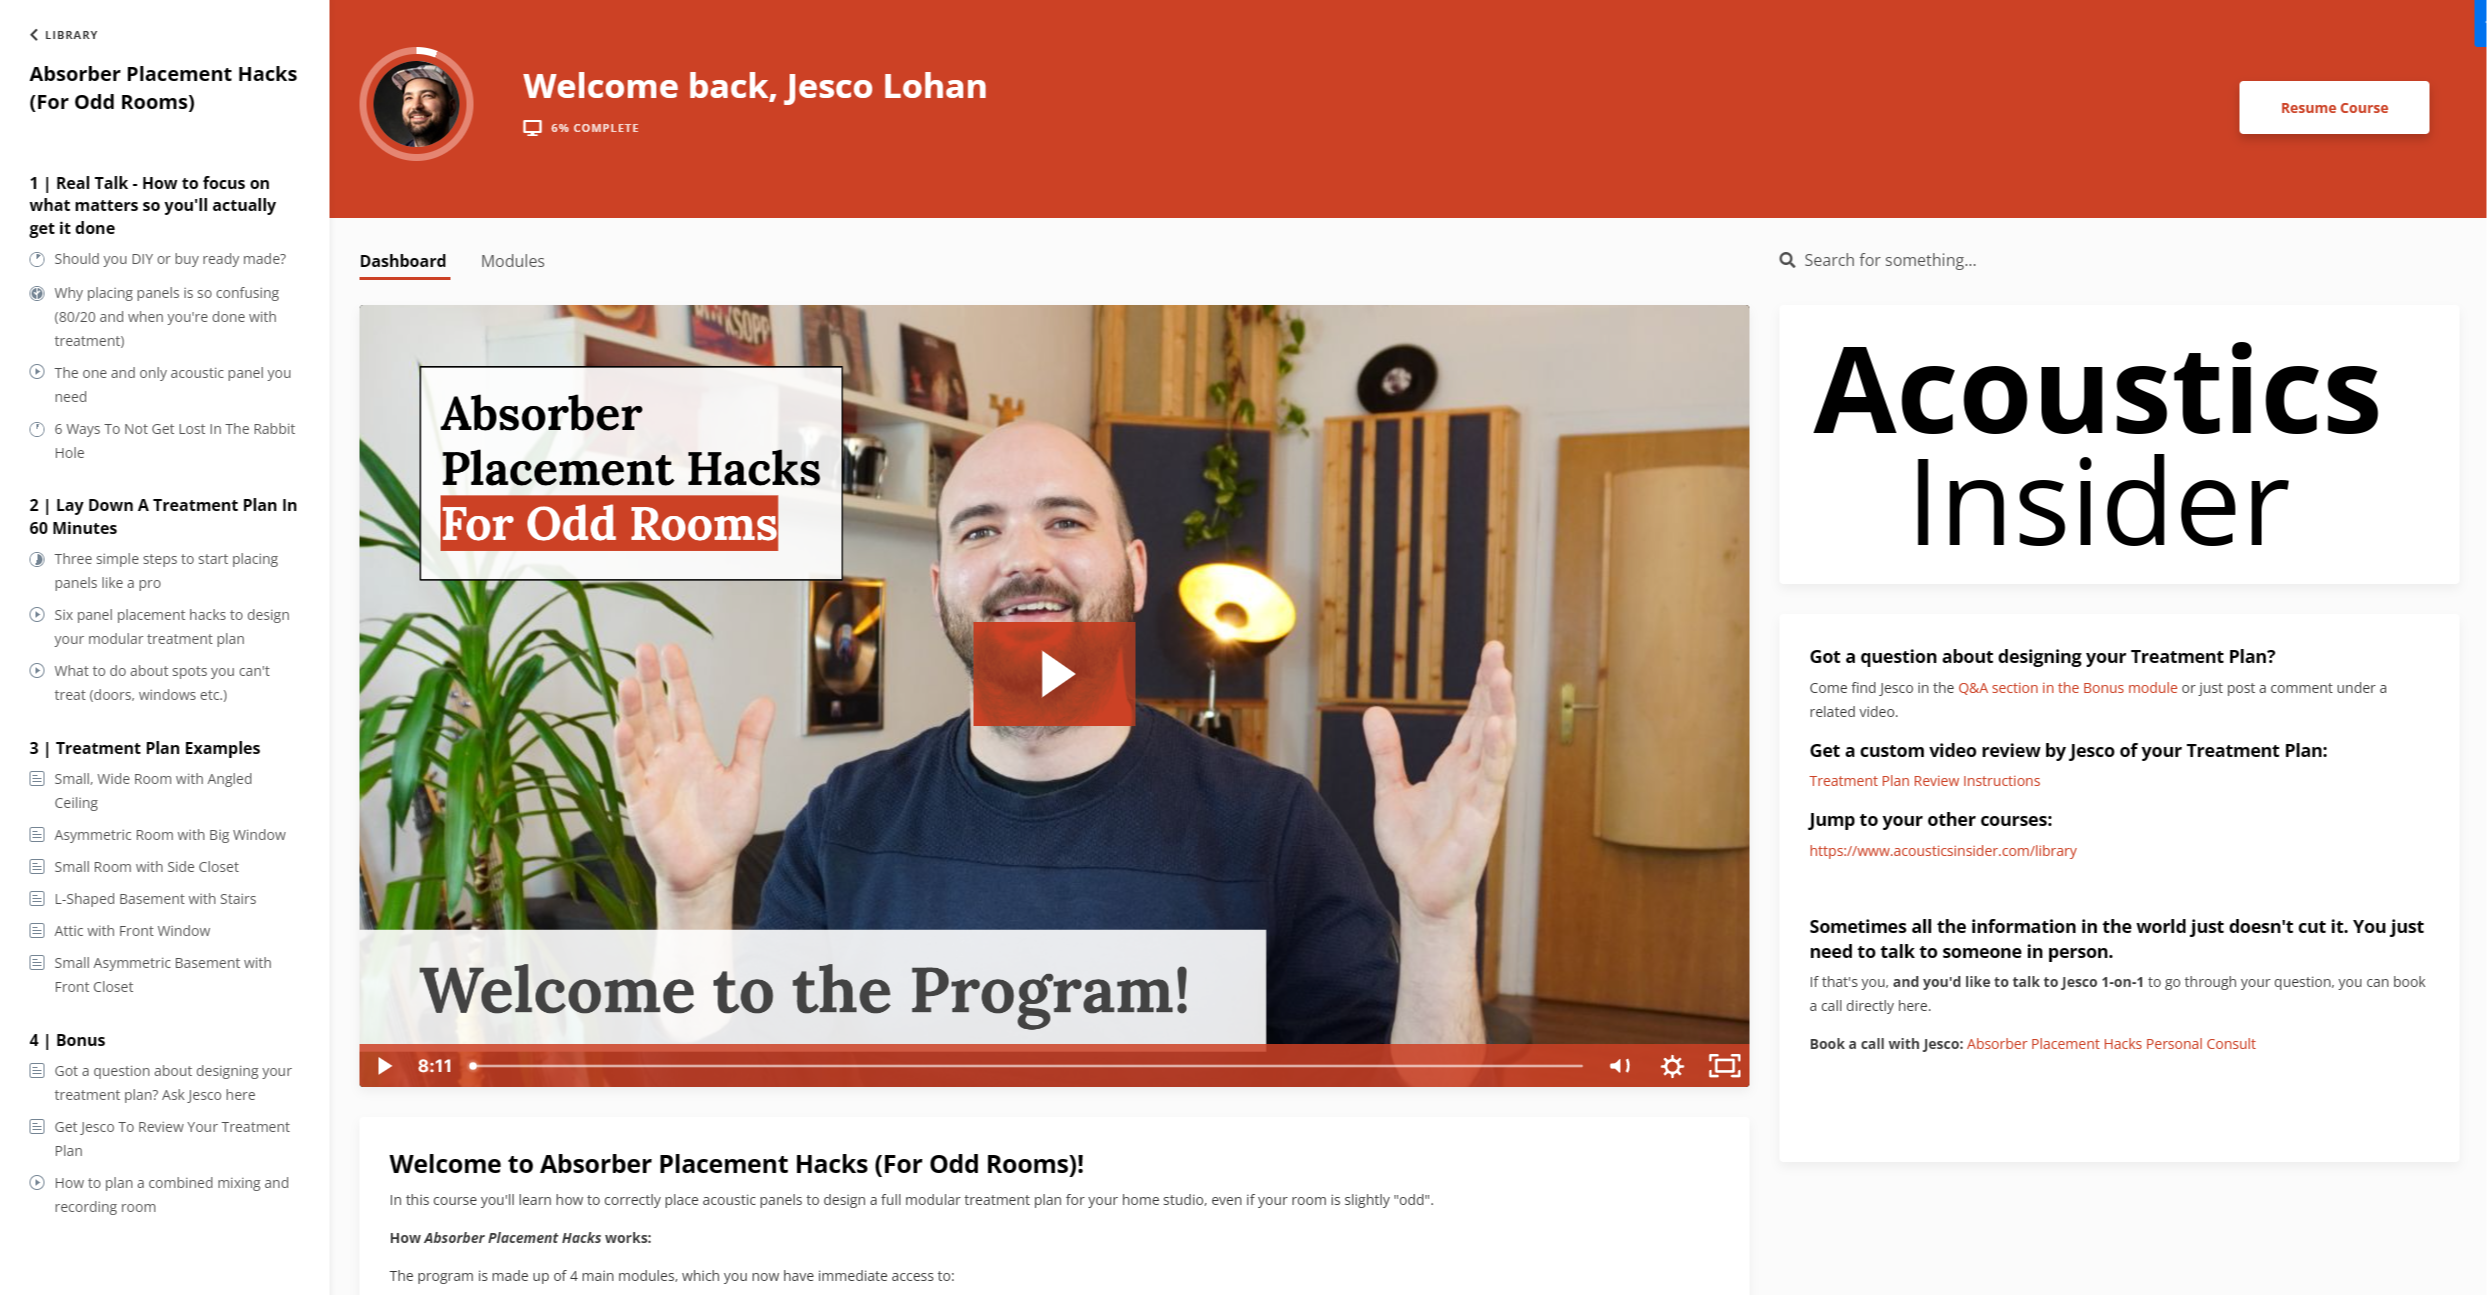
Absorber Placement Hacks!
"Absorber Placement Hacks is a simple, yet powerfully effective process for understanding exactly how to treat your mixing space (no matter how challenging the room may seem), so you don’t have to waste time trying to figure it out on your own."
GET FULL ACCESS NOW!
When you apply the concepts in Absorber Placement Hacks, you will have clarity on exactly what kinds of panels will work best for you.
You’ll know:
- Where and how to place them.
- And you’ll understand why you’re doing it.
You won’t need to invest in an engineering degree, or spend months (or years!) of your life researching each and every little step.
Of course, that’s not the best part.
The best part is how much more efficient your mixing process will be, AND how much better your finished mixes will be when you have the proper treatment in place.
Here’s How It Works
We start by walking you through all the questions that you need to ask yourself, and we take an 80/20 approach to placing your panels.
Then, I tell you exactly what type of panel you need, and how to avoid going down the “acoustic treatment information overload rabbit hole” that so many engineers ultimately get lost in.
Next, we bring it all together into a treatment plan that gives you exactly what you need to get the best possible results for your room.
The reason this process works so well for so many people is because I spent over a decade in the trenches, learning how to properly treat studios for the best possible results.
In that time, I saw lots of different rooms. All different sizes, shapes, and challenges.
It also allowed me to see what works well, and what doesn’t work as well.
This means you get the benefit of all that time and knowledge, so you don’t have to waste time and money on ideas that don’t get the results you want.
Here's What You Get
-
8 Core Video Lessons
-
6 Full Detail Treatment Plan Examples
-
Ask Me Anything Q&A Section
-
4 Bonus Video Lessons
-
Treatment Plan Review Video by Jesco
-
Lifetime Access (including any future updates)
Here’s What You'll Learn
Module 1 - How to get started without wasting a ton of time
- The 80/20 of placing panels
- Why measuring your room is a waste of time
- The only acoustic panel you need
- How to get the widest range of coverage for the lowest price
- The one mistake that will ruin your room treatment (that almost everyone makes)
- What to prioritize over frequency response
- The only spot in your room that matters (and why you can ignore everything else)

Module 2 - Get your treatment plan together FAST
- Three simple steps to placing your panels like a pro
- The most important elements in a treatment floor plan
- Whether you should focus on quality or quantity
- Why odd room elements aren’t as problematic as you think
- When you can ignore problem areas
- The main question you must answer about windows
Module 3 - Specific examples of treatment plans for tough spaces
Small, Wide Room with Angled Ceiling
How to deal with:
- Ceiling Beam
- Wall Pillars
- Angled Ceiling
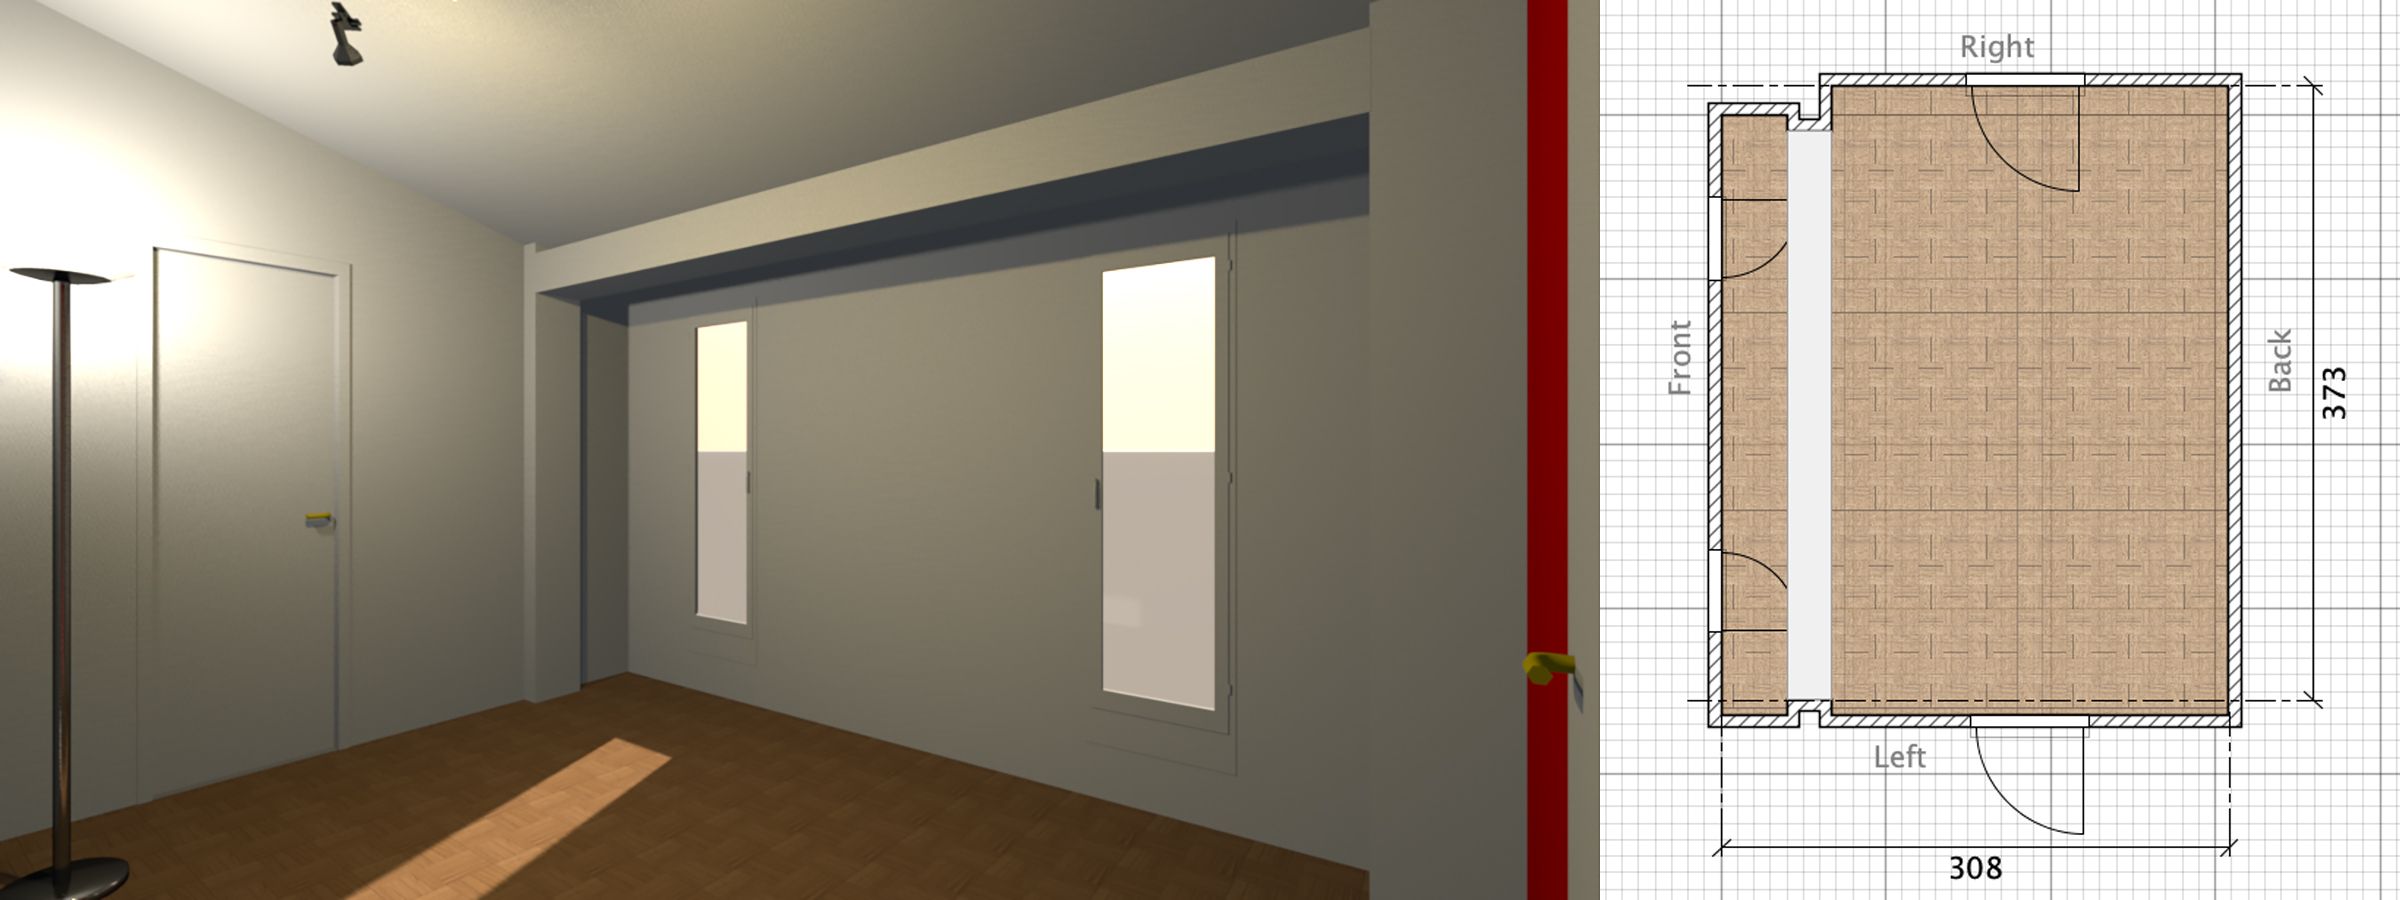
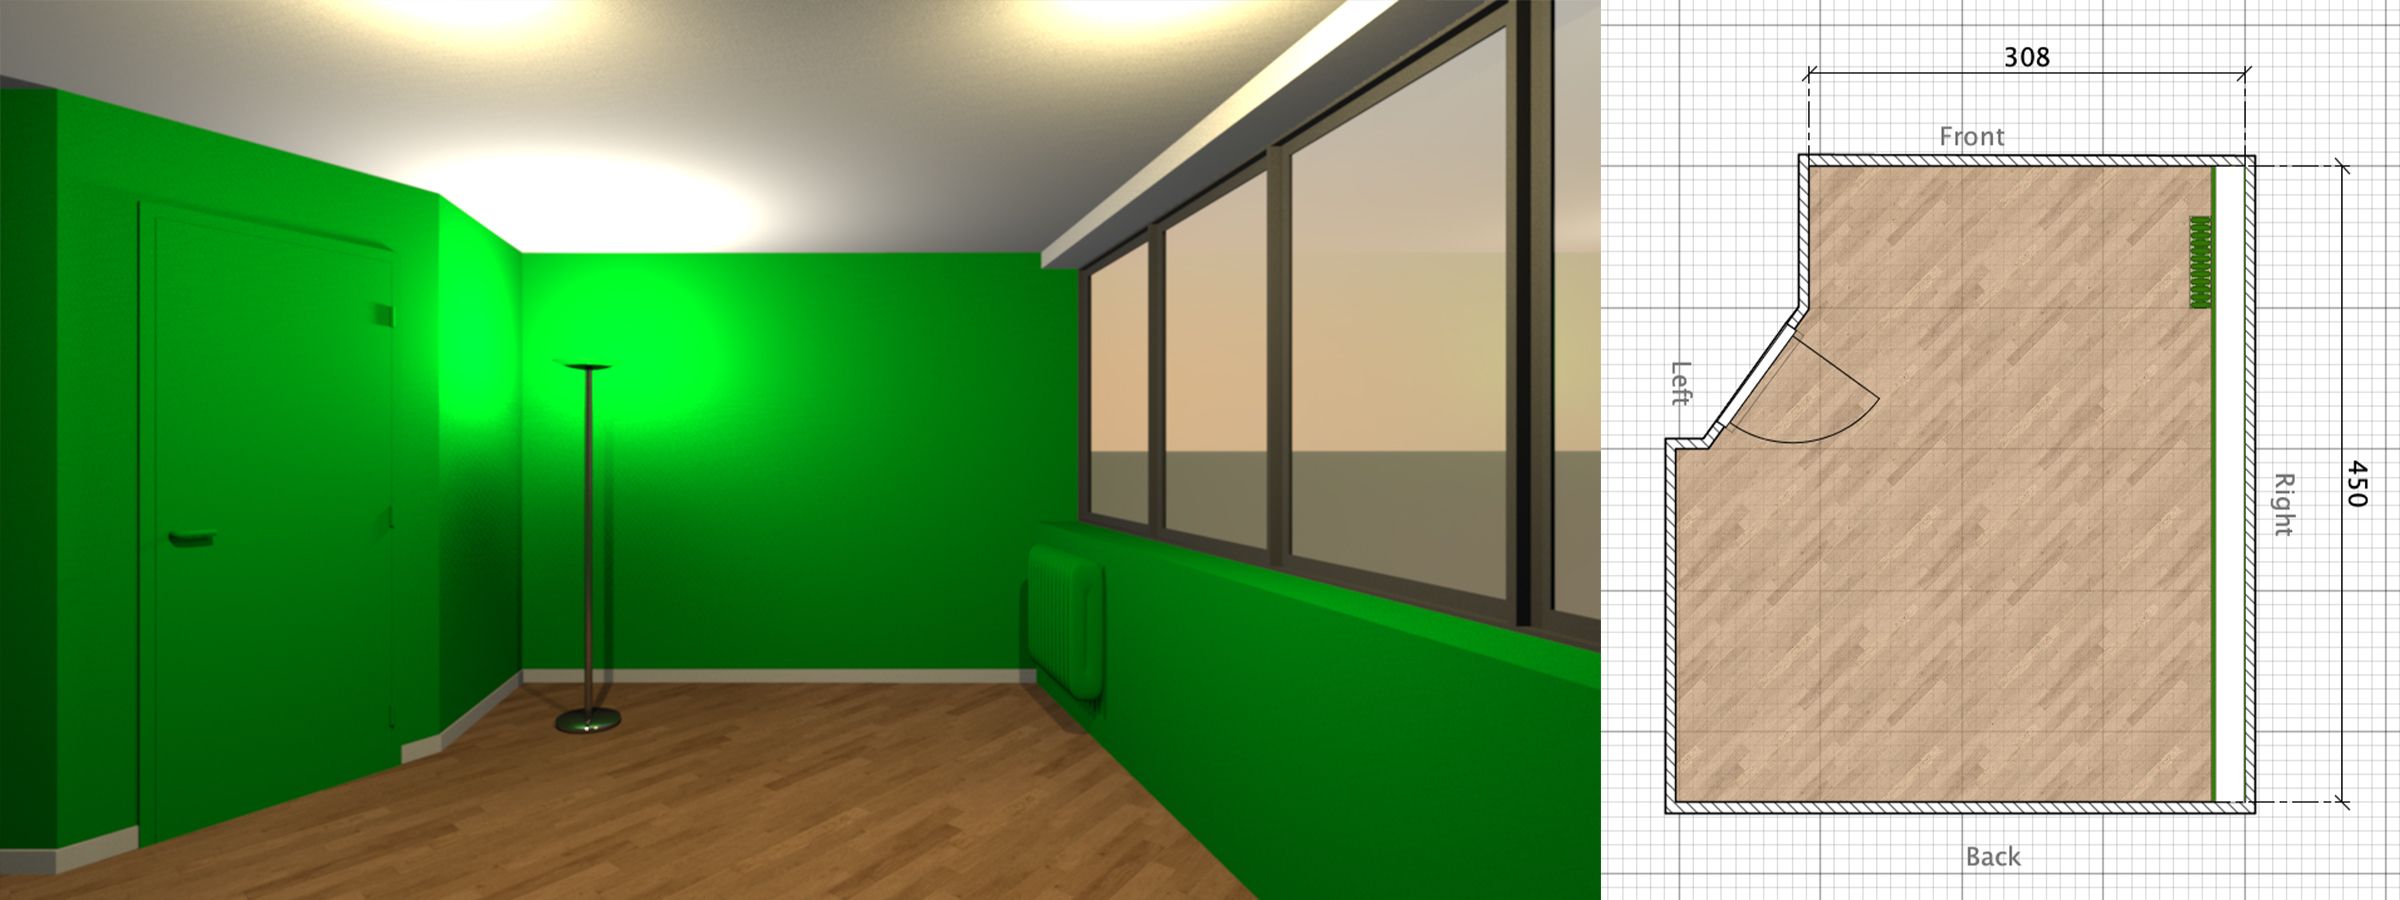
Asymmetric Room with Big Window
How to deal with:
- Big Window
- Angled Wall
- Radiators
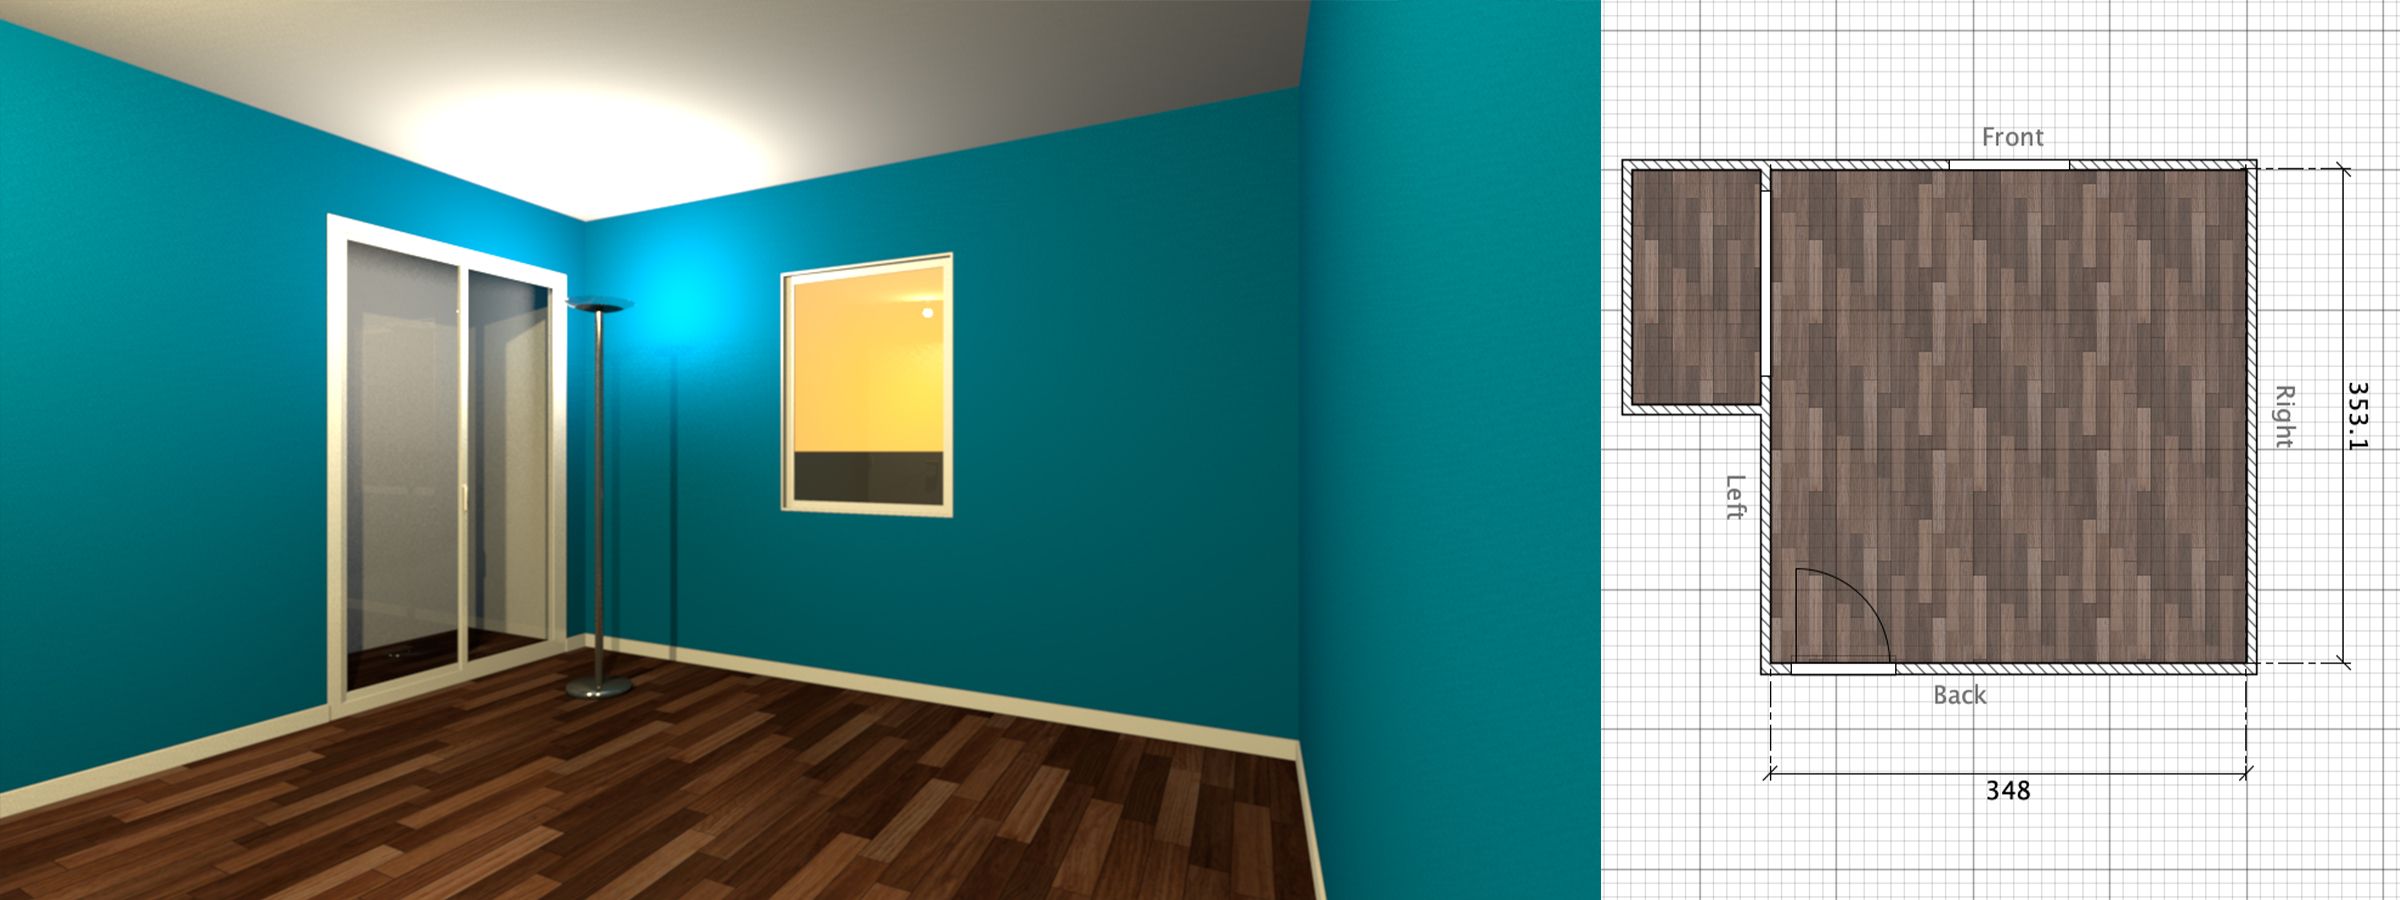
Small Room with Side Closet
How to deal with:
- Side Closet
- Door in Corner
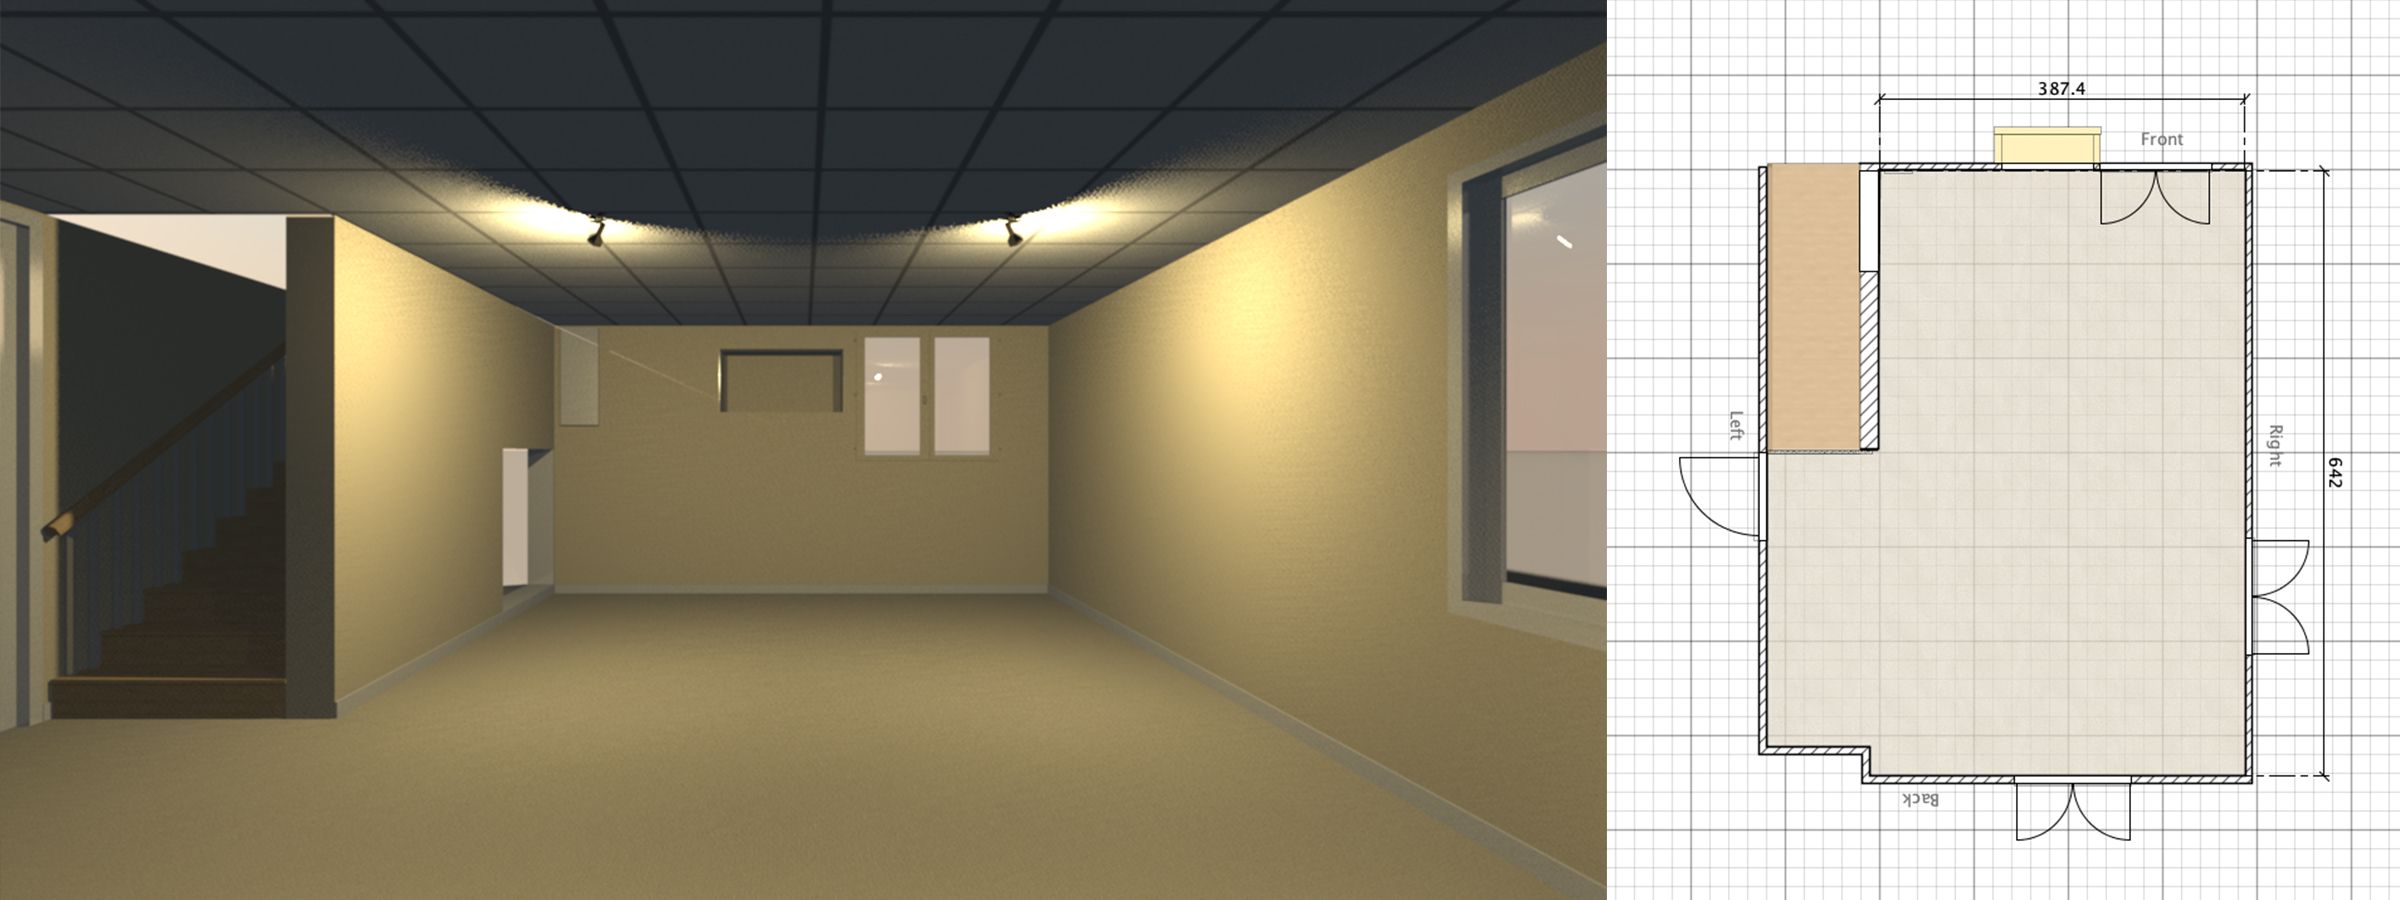
L-Shaped Basement with Stairs
How to deal with:
- L-Shaped Room
- Suspended Ceiling
- Stairs
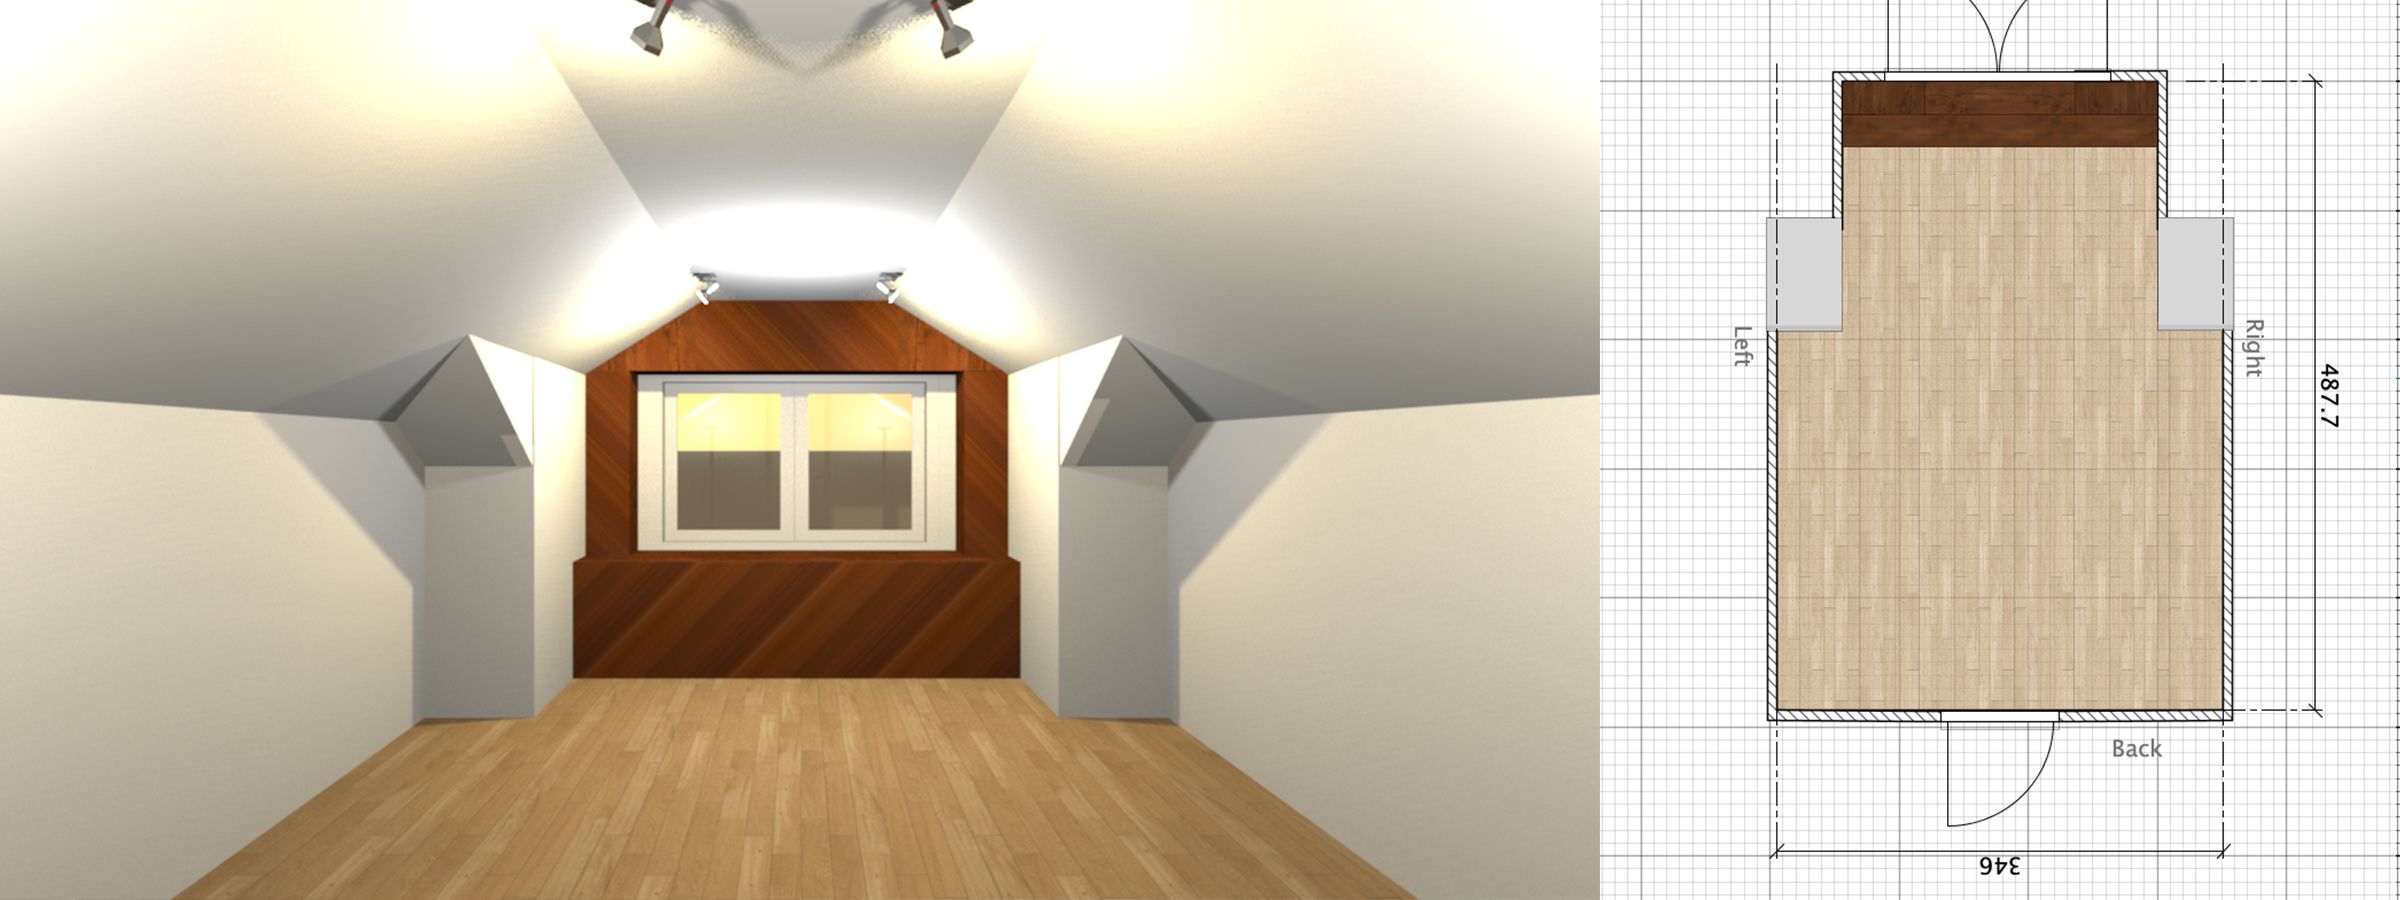
Attic with Front Window
How to deal with:
- Angled Ceiling
- Odd Corners
- Door
Small Basement with Front Closet
How to deal with:
- Closet
- Air Duct
- Odd Corners
- Ceiling Rafters

Module 4 - Bonuses
This includes:
- A growing FAQ section and the opportunity to ask me all your weirdest treatment questions.
- Bonus Videos:
- "How to make the most out of diffusion in a small room."
- "Treatment options for different ceilings."
- "Speakers right up against the wall, or absorbers in between?"
- "A method for treating a combined recording and mixing room (what to prioritize, what panels to use)"
- One free Treatment Plan Review video with personal feedback from Jesco
TESTIMONIALS
Over 300 people use Absorber Placement Hacks (For Odd Rooms). Here's what they have to say...
"I have to say, Jesco has blown me away with the clarity and usefulness of his courses, including his customer interaction. I now feel a lot more confident about designing my studio, where before I was just going to spend a lot of money, throw a bunch of stuff at the walls (and ceiling, and corners, and…) and hope it worked."
C Meyer
"I absolutely love listening to music here now... in brief, it's crazy how much separation and detail I can hear now. I had a friend over to listen to it the other day. He's a very talented jazz keyboardist and has a great ear. He was blown away at the sound, even tearing up at one point. It's amazing how much more emotional impact music can have when it sounds really good. My wife thinks there is something wrong with me for putting this much effort into the room. Lol. She just doesn't get it. But I wish I had done this years ago"
J Losee
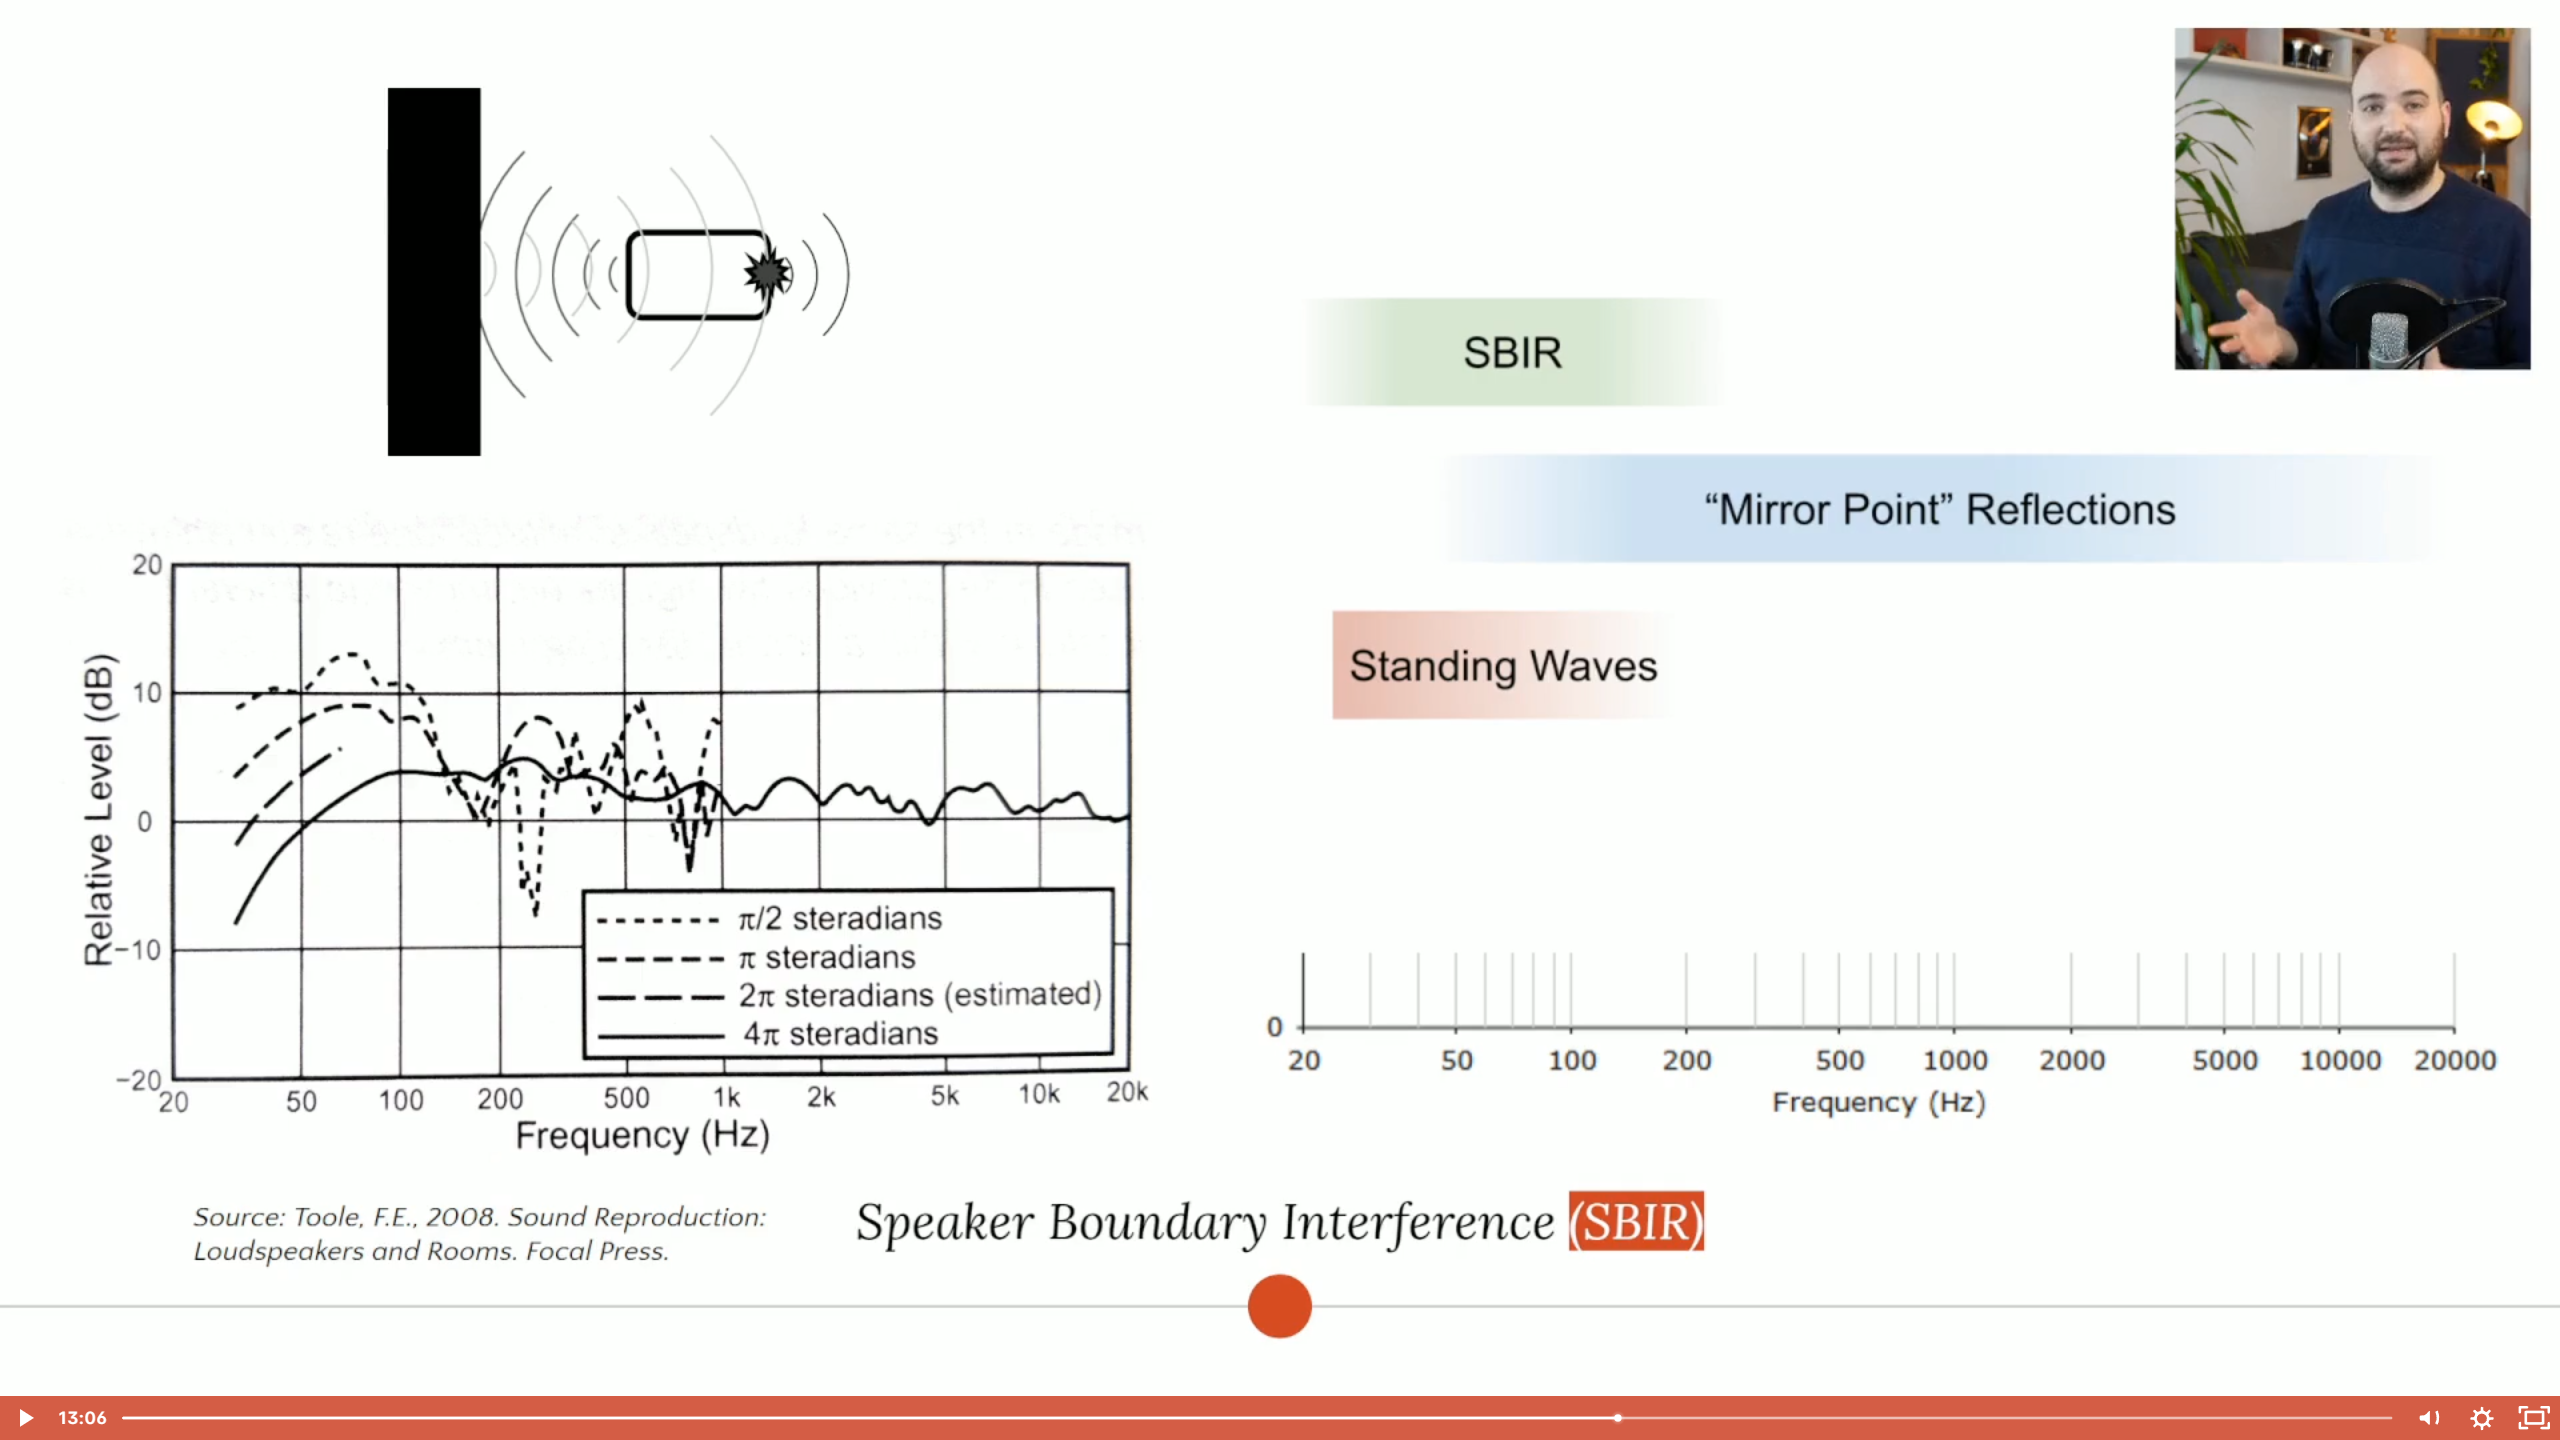
"This is the first time that the explanation of SBIR actually clicked!"
Andy S.
"It might be the dunning-kruger effect starting to kick in, but I feel somewhat confident that i can walk into almost any room and come up with a plan that doesn't suck."
G Garza
So you’re probably wondering just how much this costs.
A quick internet search shows that you can go to an online retailer and buy kits for your room that cost anywhere from a couple hundred dollars to over $3k… But you have no way of knowing if they are what you need for your space.
Consultations with companies that provide acoustic treatment start around $100/hr and go up rapidly from there… But that doesn’t include any actual treatment!
And of course, DIY solutions start somewhere in the neighborhood of $100 per panel, but without a strategy and process for placing them in your room, you don’t know what you’ll end up with.
That’s where Absorber Placement Hacks comes to the rescue!
You get everything listed above for only $247.
Just to make sure there is absolutely no risk, you have 60 days to work through the material and make sure that it’s right for you.
If you find that it’s not everything that I promised it would be, email me and I’ll refund your investment.
Get Instant Access to Absorber Placement Hacks (For Odd Rooms)
60 DAY MONEY BACK GUARANTEE
Just to make sure there is absolutely zero risk, you have 60 days to work through the material and make sure that it’s right for you.
If you find that it’s not everything that I promised it would be, email me and I’ll refund your investment. No questions asked.
Jesco Lohan - Acoustics Insider

So why should you grab Absorber Placement Hacks right now?
Listen, this process is simple and easy to follow… But it takes time.
You have to go through the course. Then you may be building panels. That takes some time (though not as much as you might think!)
Even if you have the funds to order treatment from a company, it’s going to take a while for them to get everything together and out to you.
Then, no matter which route you take, everything has to be installed.
Not to mention the fact that you’ll have to make some adjustments when you start getting a more accurate sound from your room!
So the sooner you start, the sooner you will be back to putting out great mixes for your clients.
And now, it’s time for you to make a choice.
You can do one of two things…
You can keep trying to go it alone, spending endless hours digging through forum threads and searches, building, planning, installing, and hoping for the best… All while continuing to fight with your room…
Or
You can make a small investment in Absorber Placement Hacks, ensuring that you get the right information, strategies, and guidance that you need to treat your room properly.
(Remember that you have the opportunity to ask me questions directly AND I’ll give you one FREE treatment plan review with video feedback as a bonus)
With that, I’ll leave the decision in your hands.
Wishing you the best in all your studio endeavors,
Jesco Lohan
