I Tested 100+ Studios - The ONLY Bass Trap That Works Every Time
This is week two of the Bass Trap Breakdown series.
Last week we exposed foam wedges for what they are. Today, I'm showing you what actually works.
After measuring hundreds of home studios, one type of bass trap works without fail every single time: porous material bass traps.
Understanding Porous Bass Traps
These are easy to spot. Square or rectangular boxes filled with open cell foam or insulation material. Usually covered front and back with fabric to look good.
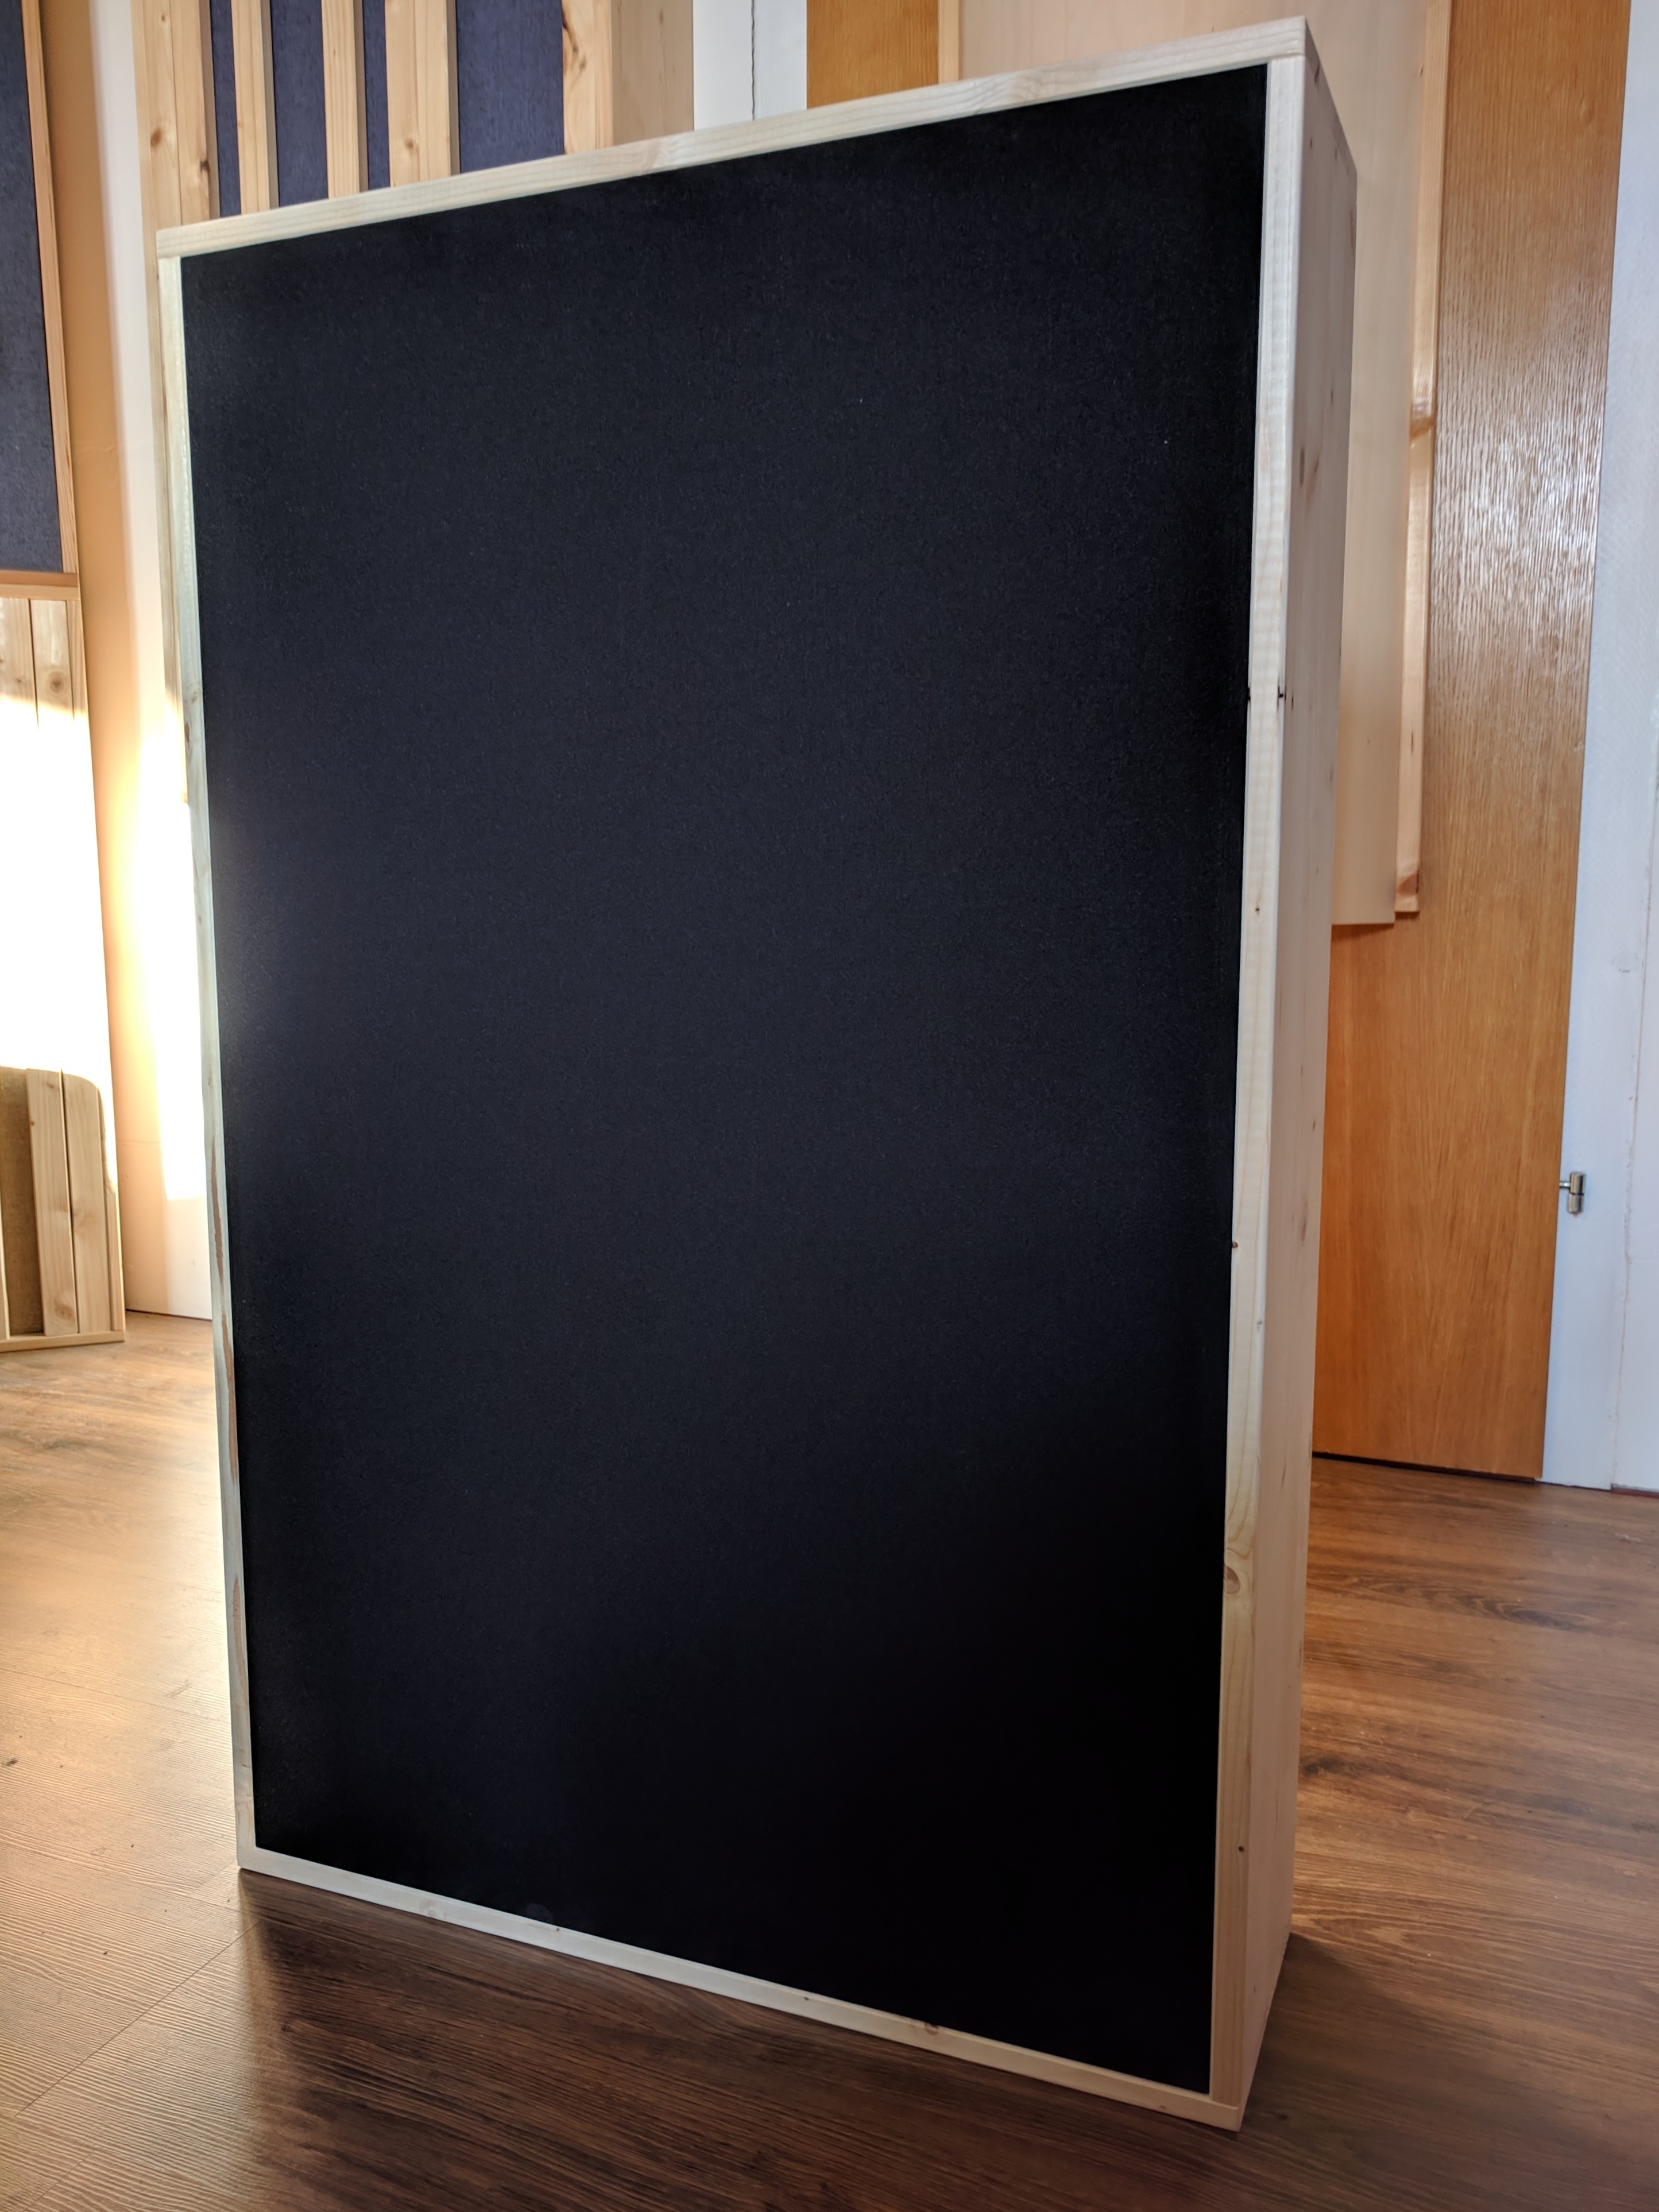
The confusing part? They're not pure bass traps. They're broadband absorbers that work across the entire spectrum. Whether you call it a bass trap depends on the depth. My experience says anything above 6 inches (16 centimeters) qualifies if you use it right.
There's constant debate about optimal density. Here's what matters: depth defines how low they absorb. Then you optimize the material density (gas flow resistance) for that depth. Shallower panels can use denser materials. Deeper traps need lower density so sound transmits through the entire depth.
One mistake I see constantly: sealed backs. A box with insulation, fabric on front, but wood sealing the back. Makes no sense. You can't use the air gap that way. Air gaps increase effective depth without using more material.
How They Actually Work
Friction. Air molecules in sound waves rub against fibers in open cell foam or insulation material. This friction creates heat, robbing the sound wave of energy.
These are velocity absorbers, not pressure absorbers. You place them where there's maximum sound velocity for the frequencies you're targeting.
Sound velocity and pressure are 90 degrees out of phase. So you place porous absorbers at a quarter wavelength from boundaries for the frequency you want to absorb. That's where the quarter wavelength rule comes from.
Let me model a 6-inch (16 centimeter) absorber.
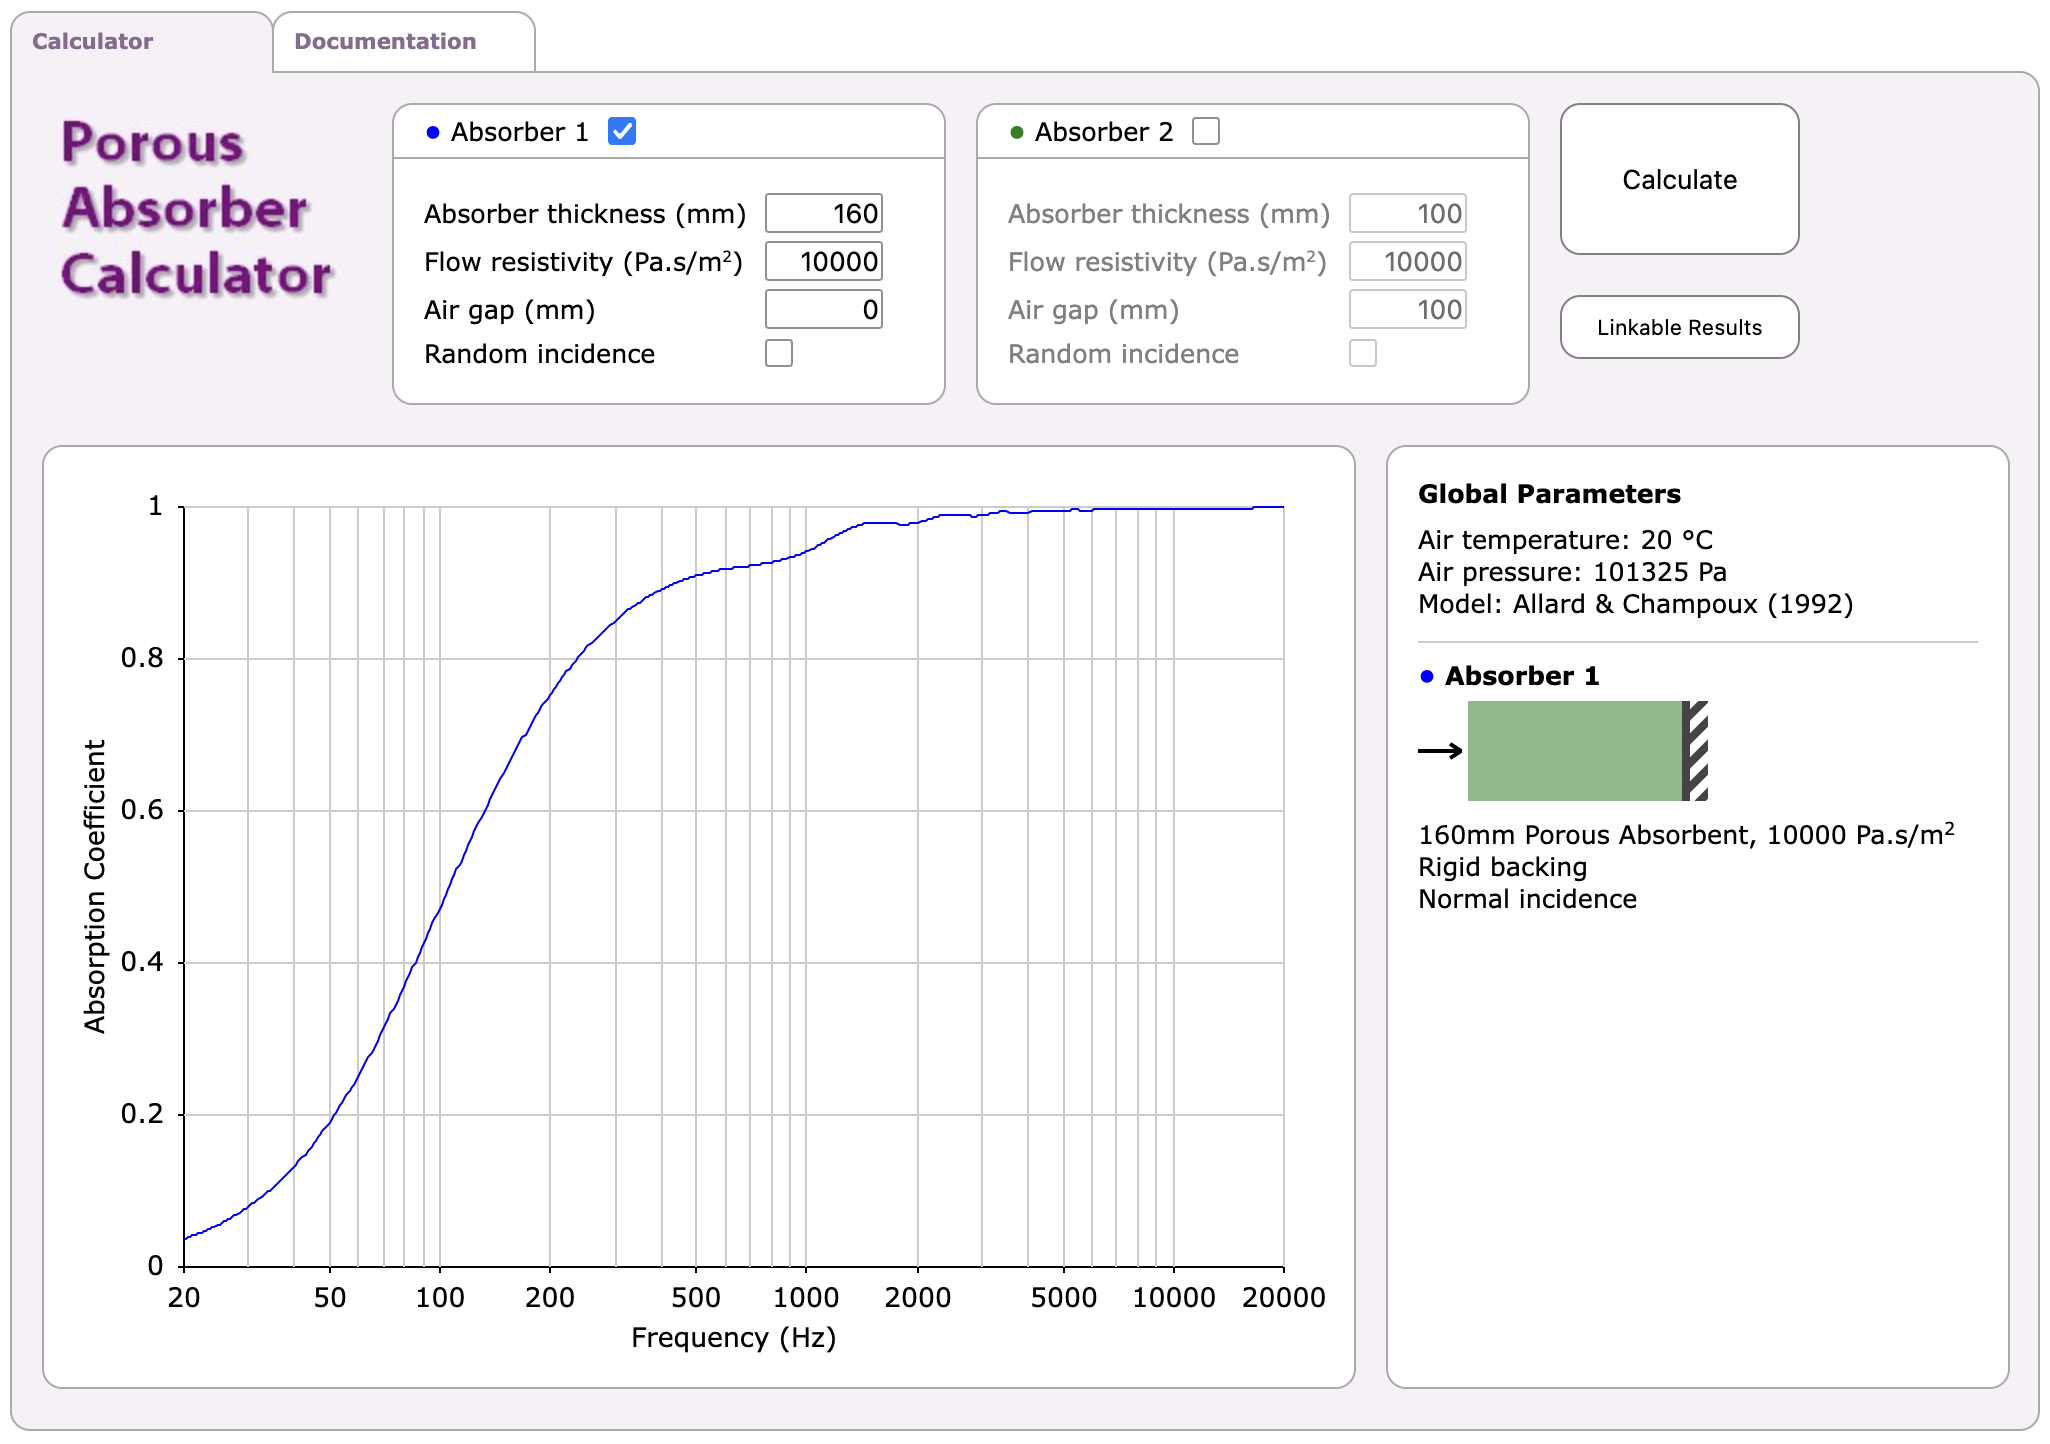
Place it directly on a wall, it's not quite a bass trap yet.
But place it across a corner? With a standard 2x4 foot (100x60 centimeter) panel, you get maybe 30 centimeters of extra air gap.
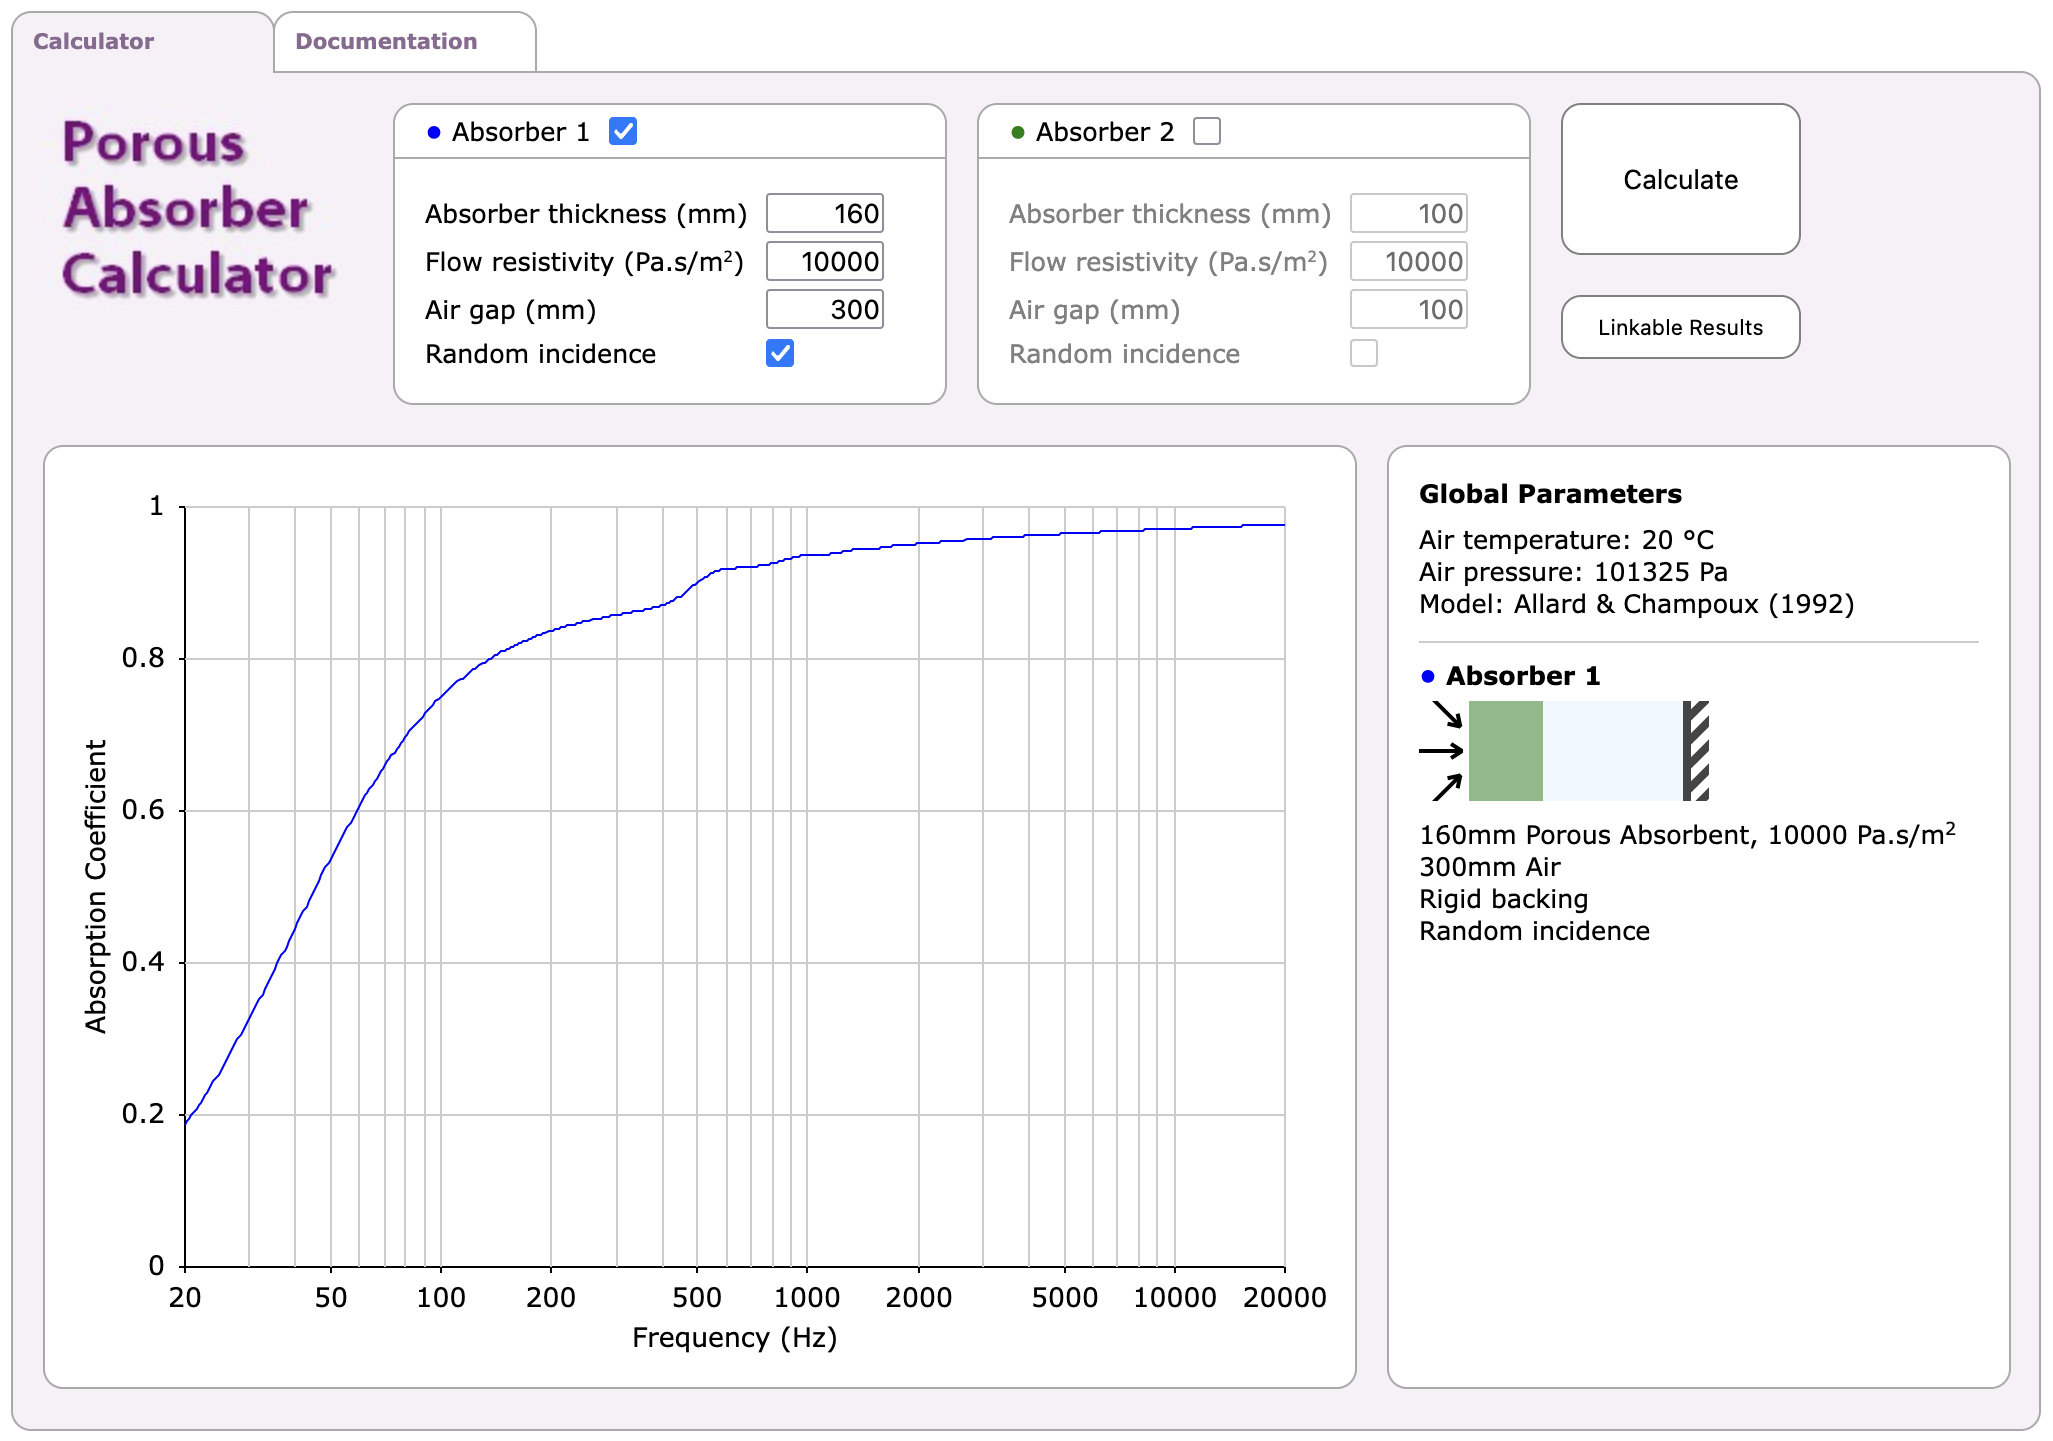
Now you're getting absorption in low frequencies.
Remember: 100Hz has a wavelength of about 10 feet (3.5 meters). To affect these long wavelengths, you need depth. Something they can see and interact with. No way to cheat physics here.
Using Them Properly
These aren't targeted absorbers. No point trying to target individual frequencies. Once you have depth, it's about putting as much in your room as you can justify.
Depth is everything. Place them across corners and you naturally create air gaps that increase low frequency performance. Put enough in your room and you'll get the damping effect you want for low frequencies and standing waves.
When should you choose porous absorbers over other bass trap types? Pretty much always. They work broadband, absorbing mids and highs along with low frequencies. Everything in one package gives them great bang for buck.
These should be your first choice starting out or working on a budget. And by budget, I mean anything below five figures.
Learning From High-End Studios
There's a reason high-end studios use so much porous material. Check out this picture from the Northwood Acoustics On The Job page.
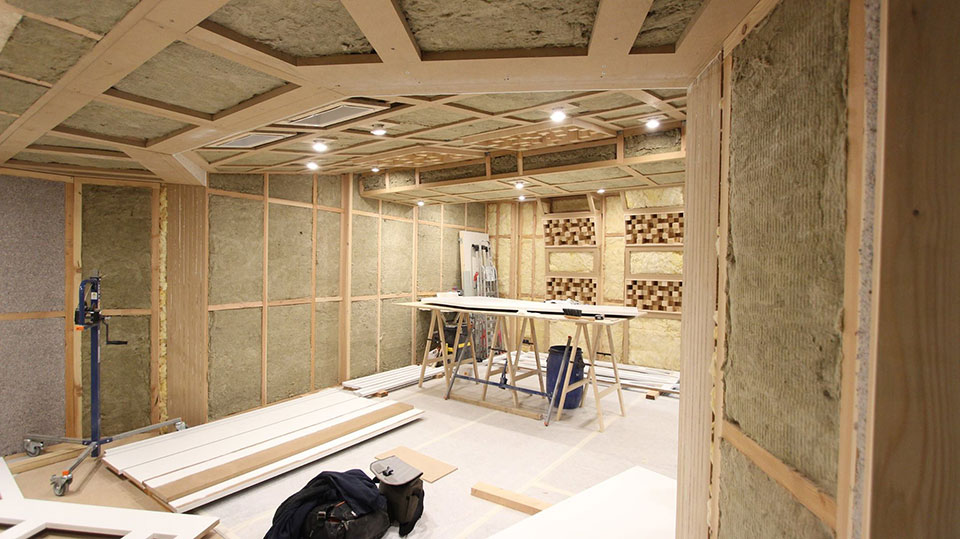
Porous absorption everywhere. Literally everywhere.
Yes, it's high-end design with different types of insulation. And yes, they use multi-layered absorbers with resonance absorbers behind insulation for real low end absorption.
But these are custom designed, super high-end studios. We have to use porous absorption much more than these designs do. Our only option is getting the most out of porous material for low end control plus mid and high frequency absorption.
Basically 80 to 90% of material in acoustic treatment is porous insulation material. There's a reason. That's why we use it in home studios too.
How Many Do You Need?
This is a quantity game. More is better. From my experience, you see effects starting with 3-4 units of 2x4 foot (100x60 centimeter) size.
Start with four traps, you'll see some effect. Add another four, then another four, then another four. It's easy to put 40, maybe 50 of these bass traps in your room. I have about 40 of this design in my room to get control.
Minimum recommendation: start with four. Then calculate in steps of about four panels to see significant benefit.
Want to see how well this works? Check the Acoustics Insider YouTube channel. These are rooms of customers I've worked with to get their low end under control. All these videos show exact measurements of how far you can get with only porous absorption.
Mistakes to Avoid
First: not making them deep enough. There was a myth years back that four inches was enough for a bass trap. Not enough in my experience. Just below the threshold I'd consider a bass trap. Even across a corner, you're not getting the effect yet.
Go to about 6 inches (16 centimeters) minimum to get what you're looking for. Anything beyond that increases low end absorption. But there's diminishing returns for price versus benefit. Around 6 inches (16 centimeters) is the sweet spot for home studio bass trap design.
Second: backing plates. Rigid wood on the back that doesn't let you use air gaps. You need air gaps for these to work in low frequencies.
Third: obsessing about density. Playing with the porous absorber calculator shows density changes affect the curve from insulation at any given thickness. But differences aren't as great as you'd think. Plus density specifications on products aren't that accurate anyway. You don’t actually have that detailed control over density. Good news: it's not that important if you're in the ballpark. You get the effect from depth, not density.
Pros and Cons
Pros: Very cheap. Easy to design, build, and use. Wide bandwidth gives flexibility. No need to target particular frequencies (difficult in small rooms where you might not be able to put traps in ideal pressure zones). Materials are widely available globally since they're used in construction. Predictable results. Do it right and you will get results. Simple as that.
Cons: They are broadband. You absorb mids and highs too. Sometimes you might not want that much. But it comes with the package.
You need depth, which means sacrificing space. Very small rooms might not allow enough depth for full control. You can improve any room, but there are limits to space sacrifice. I mean, if you're willing to work in a small box with everything else being insulation, you'll get great sound. But who wants to work that way?
Then there's quantity needed. Again, plays into the space compromise you have to make.
Variations Worth Knowing
GIK has range limiters. Owens Corning also used to sell their insulation material with a FRK surface, heat insulation glued onto the material. It supposedly increases bass absorption. My experimentation didn't show it working. But they do limit high frequencies from entering from the front. And low frequencies still bend around and get absorbed. An option if your room feels too dead.
Another option: diffuser fronts. It’s what you see in my studio and many client studios. The design I teach in Build a Better Bass Trap. Also available commercially in the GIK Amplitude series and Music City Acoustics Scatter Face. Simple diffusers on top of bass traps that scatter frequencies between 2-7 kilohertz. Makes rooms feel more lively, relaxed, not as dry.
DIY vs Commercial
The only real difference is price. You can equal commercial product performance with your own designs. The difference is you're not paying for labor. That's where the largest cost chunk sits for porous absorber bass traps.
Materials are cheap. The design isn't particularly difficult. Construction cost becomes the largest chunk. That's where savings come from building yourself.
Building 40 panels like mine? Imagine the money saved.
Of course you need time and space. But you can build these on your kitchen or living room table. No specific crazy tools needed. Time investment is manageable, especially batch building. Get a friend to help and knock out lots of panels in a weekend.
Summary
What do you need to watch out for with porous absorber bass traps?
Mainly depth. Second, quantity. You need enough. Be willing to sacrifice space.
Use air gaps behind panels for bass absorption. Make sure they're not sealed at the back.
If you're ready to stop guessing and build bass traps that actually control your low end, consider checking out Build A Better Bass Trap. It's a step-by-step system that takes you from wondering if DIY is worth it to confidently building professional-grade treatment that works. Check it out here.